Steps
Create and send a member snapshot
Submit a snapshot for an employee and their family using
POST /api/v1/groups/:group_id/member_snapshots.Populate the Employee section with your custom_individual_id and the employee’s classifications. Set the Employment information and Employment Dates. Send as much demographic information as possible in the Person and Dependent sections.Populate the Coverages list by adding a block for each plan or coverage the member and their dependent(s) should be enrolled in:- Set the
line_of_coverageandplan_idto the linked Noyo plan - Set the
carrier_configblock to the member’s chosen account structure option(s) (this section may be blank, or be populated according to individual carrier requirements) - Set the
individual_typeandcustom_individual_idto match your employee record - Set the
effective_start_dateandeffective_end_dateof the coverage. (If a user hasn’t requested to terminate coverage, use datemax of 9999-12-31 for the end date.)
event_id, reason, and date for the relevant event.With this data, a member snapshot should be ready to send. Check out our special cases documentation for specific examples of how to formulate a member snapshot for different scenarios:If successful, you should get a response with a new unique ID for the snapshot, the original contents of the snapshot, and an initial status of submitted. Your system should record the new snapshot ID to check on the status (see below).A more specific breakdown of the snapshot format can be found in the API Reference.Noyo validates snapshot content
Noyo validates the request for content and uses encoded carrier logic to ensure it has a chance to be processed by the carrier. For full detail on possible responses, see Snapshot Responses.
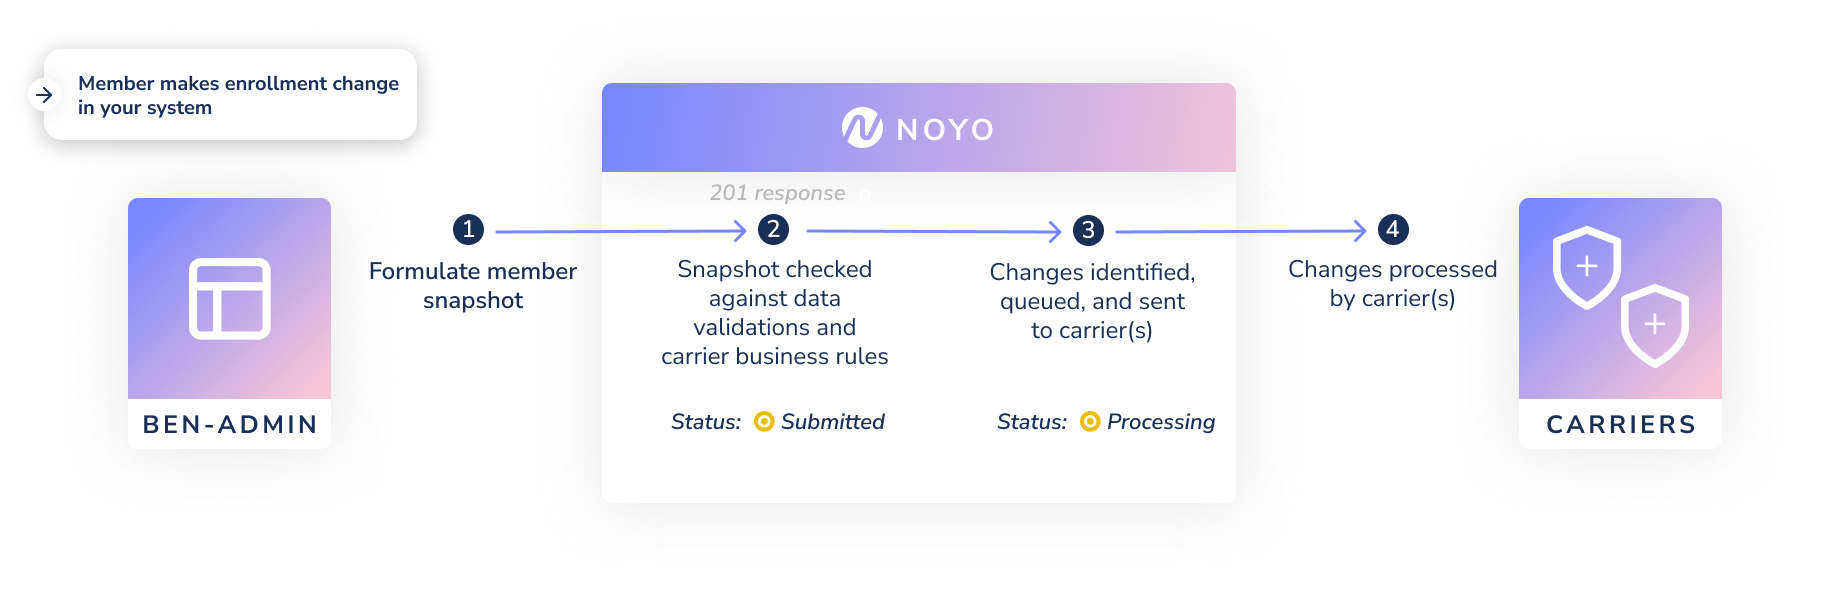
Changes identified and queued
Noyo will process the snapshot contents, break the snapshot into transactions, generate the correct payload to each target carrier, and determine what queuing might need to happen to conform to the carrier’s requirements.
Carrier processes changes
The carrier makes the submitted changes in their system. Most changes for Sync carriers are completed in seconds. The next steps depend on whether you are sending changes for a Sync or Send carrier.
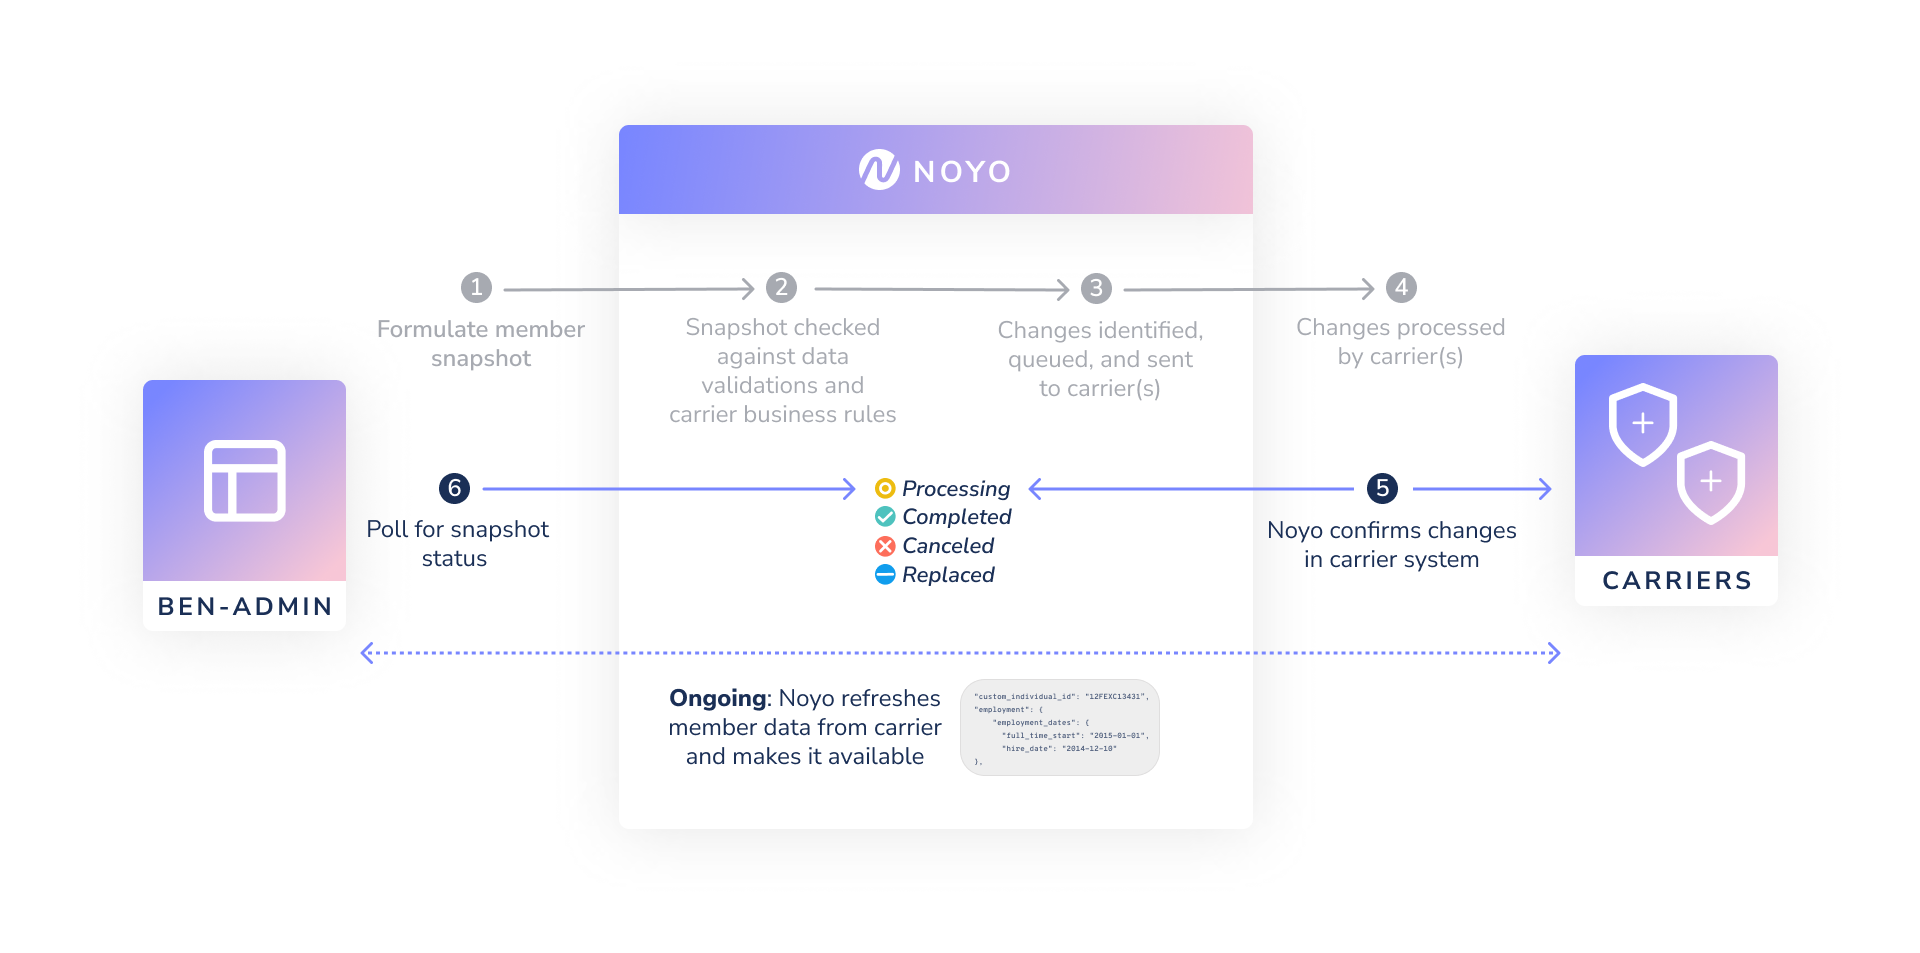
Noyo confirms that the change was made (Premier connections only)
We’ll check that the transmission was successful by immediately checking the carrier’s system to see that their data has been updated to match the request and they are done processing the data. This is the first step of our round-trip confirmation process to ensure that member data is accurate across systems.
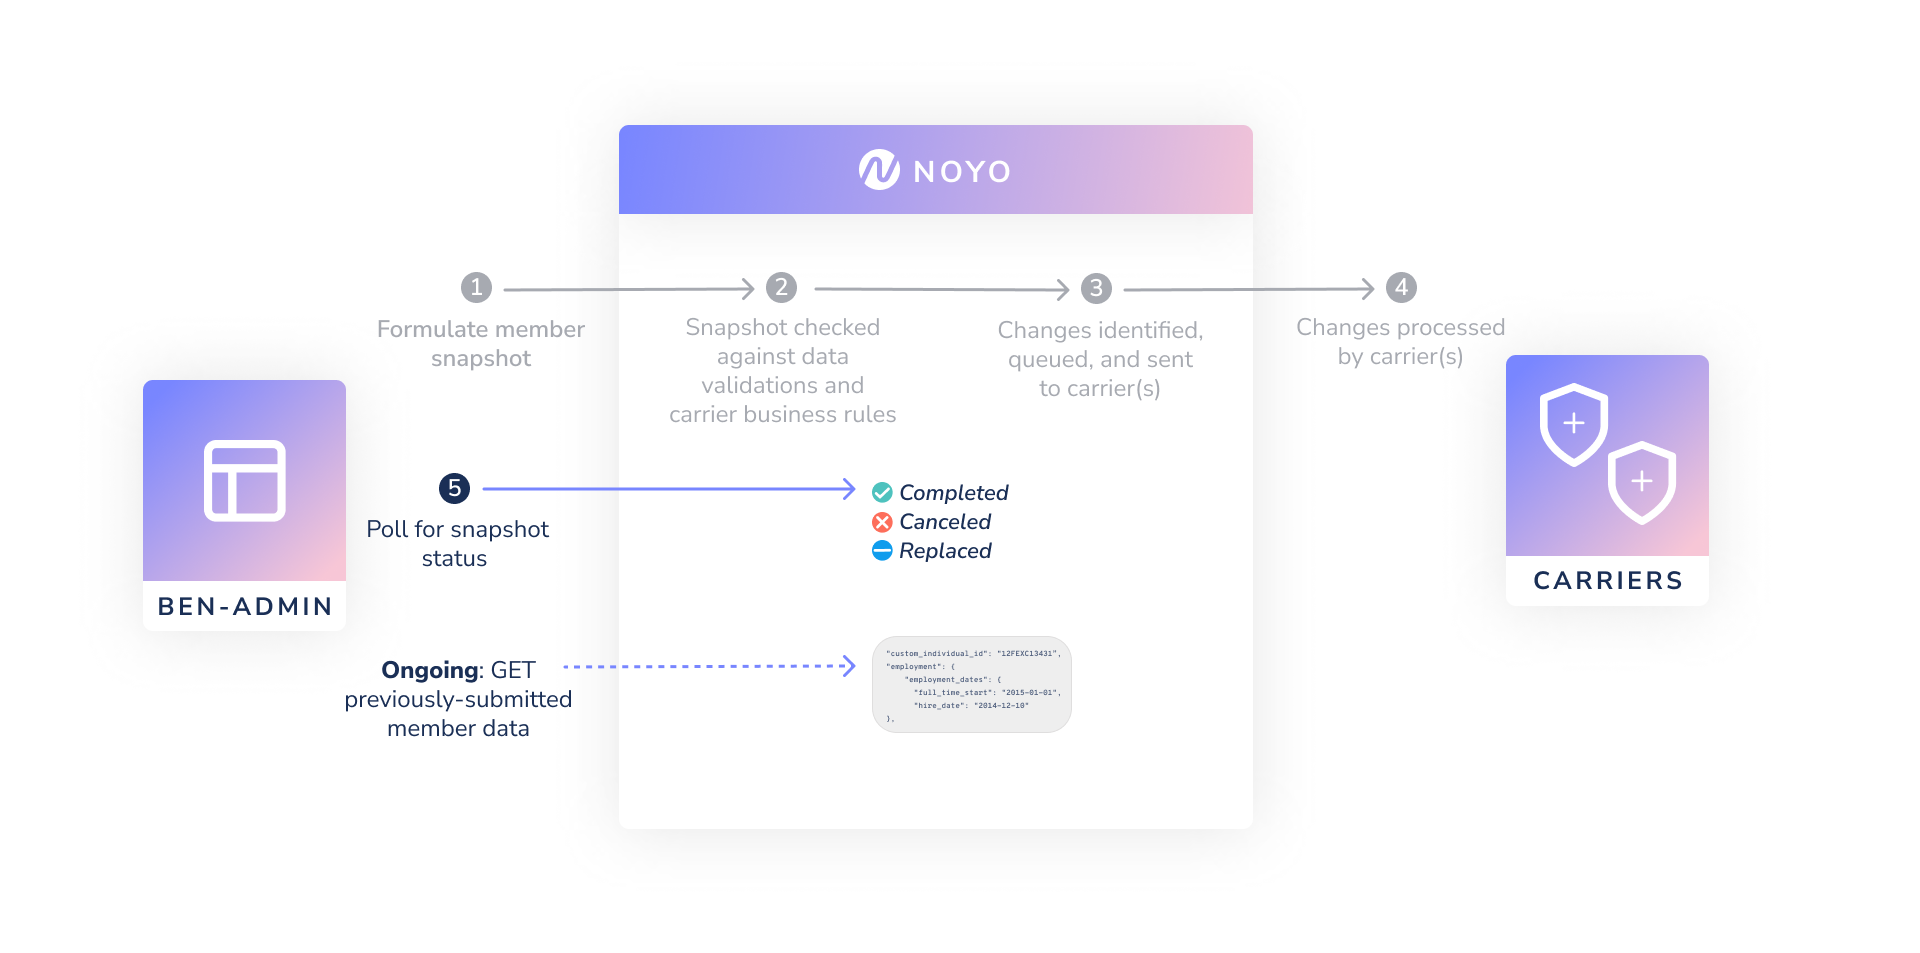
Check the status of submitted snapshots
We recommend reading Snapshot Statuses to see your options for detailed status tracking
- One or more transactions in the snapshot have not been completed by the carrier yet (
processing) - All transactions in the snapshot have been completed by the carrier (
completed) - The request was canceled and no change was sent to the carrier (
canceled) - We received a newer snapshot for this family (
replaced)
complete. If any transactions had an effective date in the future, our second round-trip confirmation check validates the data with the carrier again on that date.Get updated member data on demand and manage discrepancies
You can use our member data endpoints to pull back the latest info into your own system. If desired, you can use this data for reconciliation, or to support your own internal tooling.We offer out-of-the-box discrepancy management in the UI or via the Tracking API, where you can understand and manage discrepancies, including seeing a side-by-side field comparison between what you submitted and what the carrier has.
Premier Connection flow
Advanced & Standard Connection flow